Understanding Design Thinking Part 3: Creative Ideation Methods

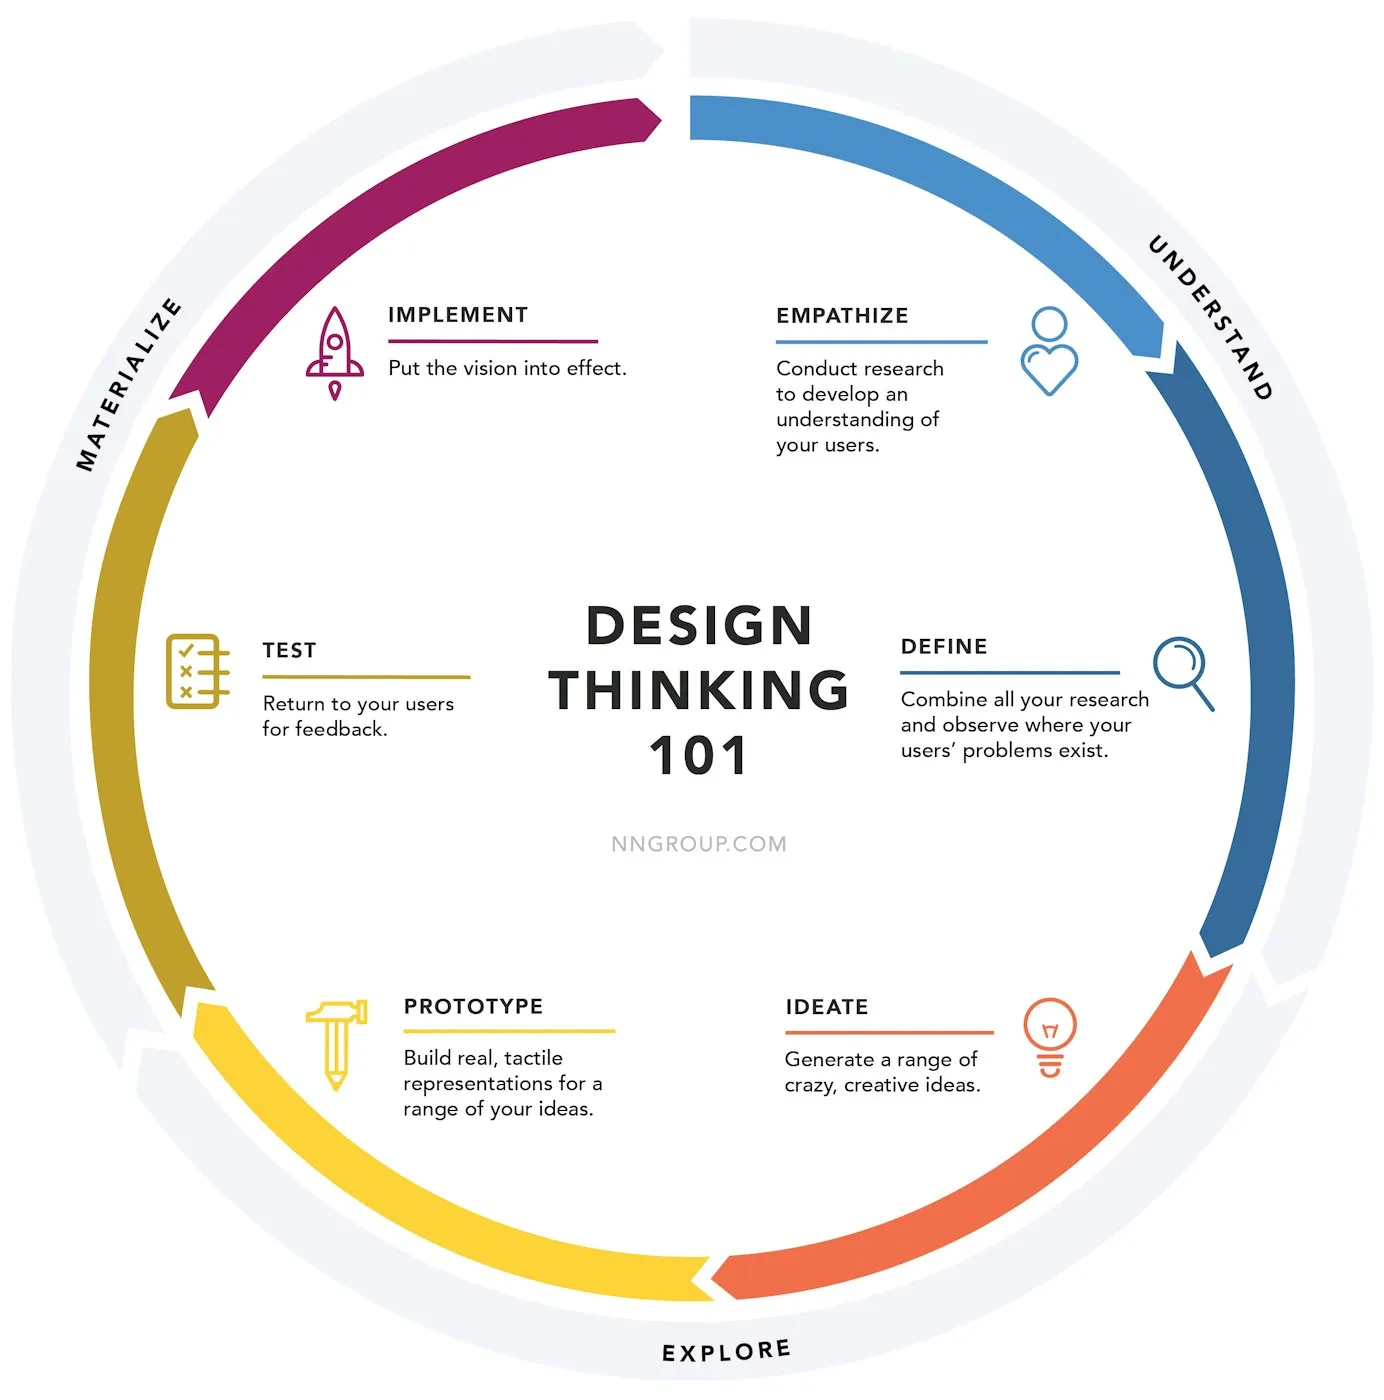
This article is the third in a series on the Design Thinking Method with a focus on ideation. If you want to catch up first, here you can find part 1 and part 2. The Design Thinking Method is an iterative process used by many of the most innovative companies and organizations. It consists of 5 stages:
- Empathize
- Define
- Ideate
- Prototype
- Test
It can be visualized like this:
In this article, we dive into the third stage of the process: Ideate.
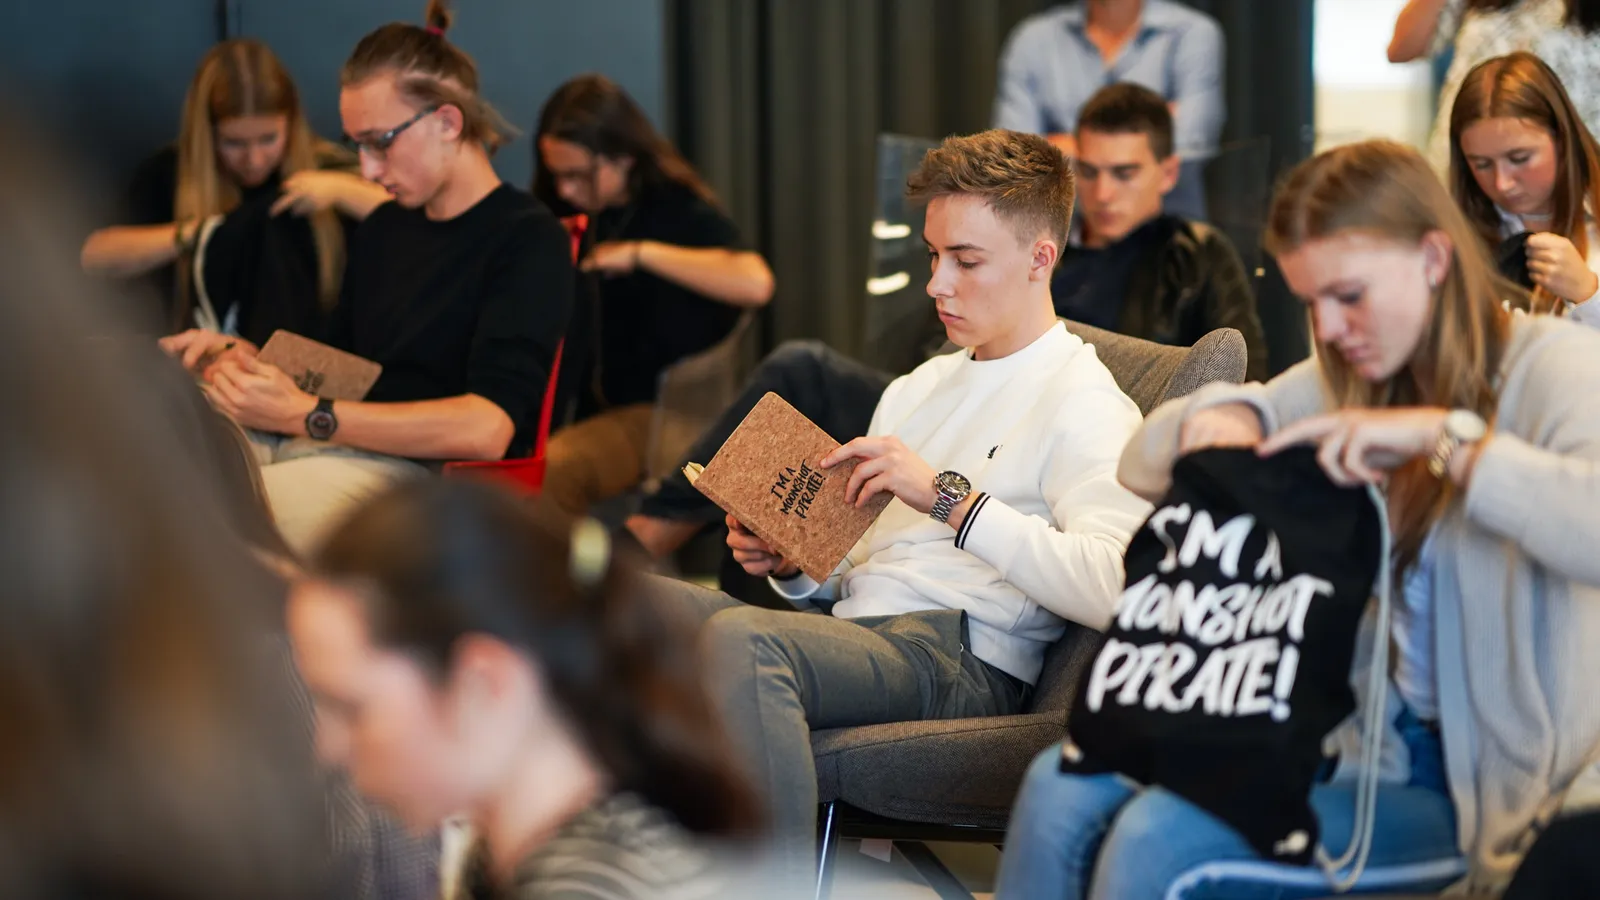
Ideation: The Birth of Ideas
The third stage of the design process is ideate. This is what we usually think of when we think of designing new solutions. Ideation is the process of, firstly, coming up with ideas, and, secondly, selecting the best ideas and developing them further.
As with all parts of the design thinking method, your ideation process needs to be user-centered and problem-focused. That means always keeping the user personas and the problem statement in mind when coming up with ideas.
The process of ideation constituting the backbone of this phase is brainstorming. There are many ways to brainstorm, and the process can take anything from 10 minutes to 10 hours, depending on the aim of your brainstorming session.
However you decide to do it, remember that the first golden rule of ideation is to generate ideas! Lots and lots of ideas! You can always judge and evaluate them later. First, though, we need to have something to judge and evaluate, right? So let’s dive into the brainstorming process!
Brainstorming
Brainstorming is a creative process where several brains come together to generate ideas for a certain problem. This last part is important to note: a brainstorming session works best if it focuses on a specific issue. Tackle 1 SDG or 1 clearly defined problem. Don’t just brainstorm and “see what happens” – that’s probably not going to get you the results you’re looking for. Having a few constraints in place tends to increase creativity and also makes sure your ideas revolve around a problem.
Generally speaking, ideation is a process consisting of two phases:
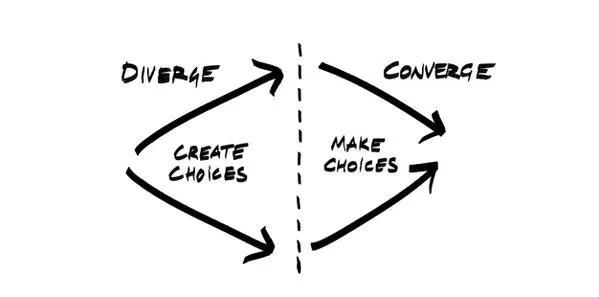
- Diverge: Generate lots of ideas and paths you can explore further.
- Converge: Narrow down and select which path(s) you want to follow.
Both are necessary for your ideation process, and you might have to go through several iterations of this process. For example, you might generate 100 ideas in your first divergence phase, narrow those down to 25 ideas in your first convergence phase. In your second iteration, you explore the options of those 25 ideas, perhaps generating 50 ideas, which you again narrow down to a handful, etc. This helps you to expand both vertically and horizontally, giving you the best of both worlds and making sure you both think broadly and deeply.
General Tips for Ideation
Ideation processes can take place in many different ways, but there are a few qualities they should all have in common to work best – especially in the divergence phase.
Here are a few tips to get the most out of your ideation:
1. Set a Time Limit: To generate as many ideas as possible, set yourself a generous time limit and use the whole time for just generating ideas – don’t do any evaluation or further development yet.
2. Wait with criticism: At the beginning of the ideation process, it’s only allowed to say: “Yes, and…”, never ever “yes/no, but…”. The atmosphere should be open and uninhibited.
3. Go wild! Crazy ideas might not always be feasible, but they are an important stepping stone for actual innovation. Remember, ideas can be refined later on and made more realistic later on.
4. Aim for quantity: Even if you think, you have a perfect idea, don’t stop generating more. The more ideas you generate, the more thorough you understand the problem you are tackling – and you might be surprised what gems hide at the very end of a brainstorming session. It takes time to get into the real flow.
5. Get Creative: In addition to writing notes, try out drawing, using post-its of different colors, creating a mindmap, doodling, whatever. Getting creative might produce more creative ideas.
How you physically do the brainstorming session is up to you. Tools such as miro or mural are great if you have a remote team and need to work online. Otherwise, pen and paper are amazing tools for brainstorming.
Here is an article about facilitation that might help you get the most out of your brainstorming sessions.
Start With Play
Playing and working do not have to be opposites. Actually, especially for creative work processes such as ideation, you can achieve more with play than with hard work. Play is simply a mindset of trying things out, experimenting, not setting any boundaries for your creativity, and not being afraid to go down unexplored paths.
Visualization
A cool way to start with the ideation process is to get an idea of the issue you’re trying to solve, so why not play around with visualizing the issue and the solution? Build around with LEGO bricks, work with clay, or do a collage of the issue and the solution. It does not have to make sense. The aim is rather to give you a sense of how the issue and the solution feel, which thoughts move around in your head as you play around, and what words come out of your mouth when you present your visualization to our team.
It might seem a little silly to begin an ideation process that aims at solving poverty by playing with LEGO, but actually many professionals and big companies use this process to get a clearer idea of new problems, projects, and products.
Roleplaying
Another playful method to use throughout the ideation process is roleplaying. Pretend to be someone affected by the issue you’re solving or someone who might be affected by your solution. It forces you to become more aligned with those involved (both in a positive and in a negative way) in the challenge you’re dealing with. This is not a substitute for user research, but it is a first and fun step in that direction.
Worst Possible Idea
Anytime you feel stuck, it might be an idea to flip the whole ideation process on its head and try to generate the worst possible ideas. This tends to give you a new perspective on the challenge you are trying to solve and maybe you’ll get a good laugh to keep your motivation high.
The Six Thinking Hats
Another method for successful ideation is to use Edward de Bono’s Six Thinking Hats. It is easy to get caught up in only one thinking mode or to get into conflict during an ideation process because criticism is offered at the wrong time or emotions get too strong.
The Six Thinking Hats method is a way to avoid that. Each of the hats represents one mode of thinking.
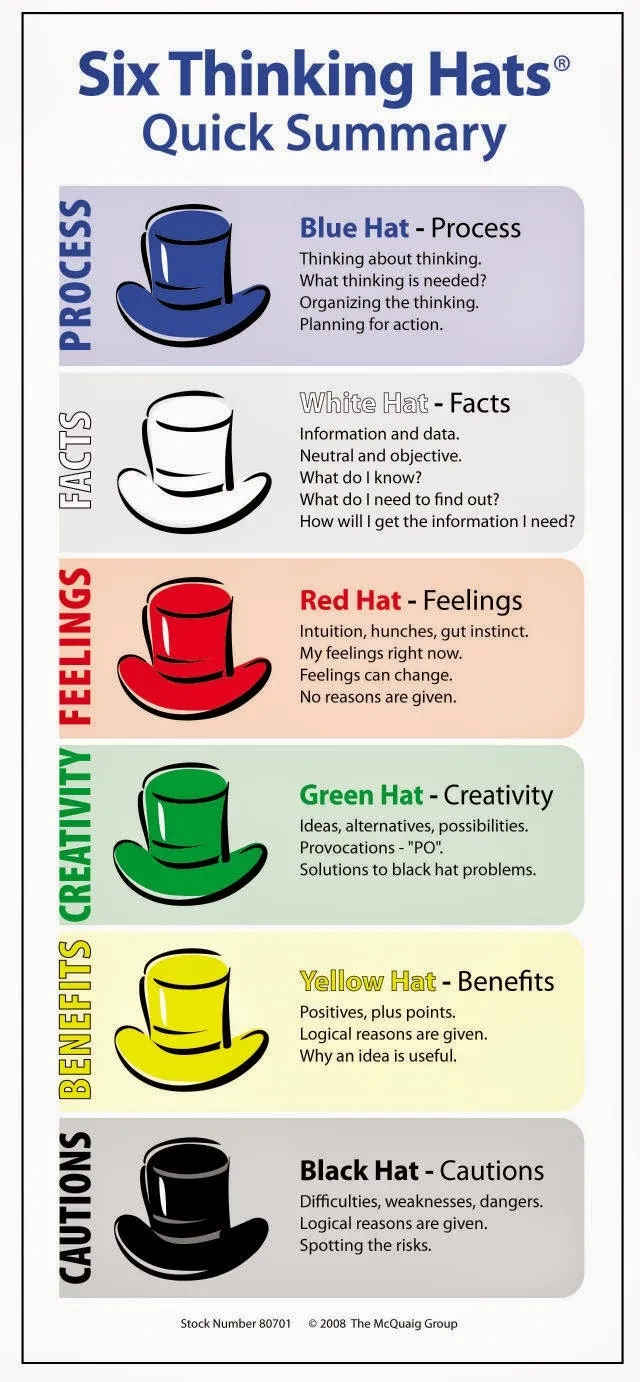
- Blue: Ideation facilitator. Decides which hats can speak and how long the session lasts.
- White: Only states facts and figures. The logical thinker.
- Red: Only concerned with feelings and emotions. Brings a more human aspect to the discussion.
- Black: Focuses on problems and criticism. Important for getting awareness of which minor issues are involved in the larger problem.
- Yellow: Spreads positivity, optimism and encouragements. Sees only solutions and opportunities.
- Green: Generates new ideas. The creative hat.
Most likely, a bit of each color is needed to end up with a final epic solution. The green hat is great in the beginning, and also along the way if you have reached a dead-end. The white hat is great for turning the idea into something more realistic and tangible. The red hat and the black hat put the ideas into a broader context, and the yellow hat keeps motivation up.
Whoever wears the blue hat decides when and how many of the participants should wear which hat. At first, everyone but the blue hat might wear green hats. Later on, one might be appointed a yellow hat for a while and another one switches between red and white.
This ideation method is great for attacking the idea generation process from different angles and getting a very thorough picture of the issue being tackled.
Evaluate & Explore
Your brainstorming session is over, and you now have a gazillion ideas and directions you could explore further. So what do you do now? You evaluate your ideas and select the crème de la crème you want to explore further.
How? Here are two ways you can go about it:
- Voting: Every participant of the brainstorming session get a fixed number of votes (3-4 works well). Everyone then gets to vote for their favorite ideas, and by the end, you should have a smaller selection to continue working with. More than one participants can choose the same idea. If you still have too many ideas, you can do another round of voting, giving everyone 1-2 votes.
- Four Categories: Every participant of the brainstorming session gets to select two ideas for each of these 4 categories; most rational, most delightful, the darling, and the longshot. More than one participants can choose the same idea.If you still have too many ideas, you could do a round of voting.
Regardless of which ideation method you use, you’ll now have a smaller selection of ideas to choose from. It’s okay to have more than one darling you’re not ready to part with. Actually, we would recommend that you keep your options open and keep a backlog of old ideas. You never know when you might need them.
In order to decide which idea to continue with, review your problem statement and your user personas, and estimate: Which idea best fulfills the needs of your target audience? In the end, that’s what will decide whether you succeed or not.
Select one idea that you’ll pursue a bit (seriously, you haven’t really picked the final candidate yet – you’re just figuring out which idea you’ll explore a little further first. Pivoting is normal). Before going onto prototyping, it may be a great idea to do another round of brainstorming on just that one idea. This will help you figure out which ideas are hiding with that one idea as well as all the different ways your final product could look. You could do a short 10-minute brainstorming sprint to explore the idea in depth.
Once the ideation is done, get ready for some prototyping! That’s what we’ll look at in the next article.